The Beast of White Orchard
The Witcher 3: Wild Hunt · Quest walkthrough
The Beast of White Orchard is the third main quest of The Witcher 3: Wild Hunt. It is set in the starting region of White Orchard. The Nilfgaardian commander Peter Saar Gwynleve knows where Yennefer has gone, but he will only tell Geralt if Geralt brings him the head of a griffin that his soldiers could not hunt down. The job has two parts. First you investigate the monster with a herbalist and a hunter. Then you fight it in a two-phase battle alongside Vesemir. Fandom lists the quest at level 3, while Fextralife lists the suggested level as none, so treat the level as a loose guide. The quest is not missable and cannot be failed (Game8). It runs inside Lilac and Gooseberries, and when it ends you return to that quest.
AI-written walkthrough. Includes this quest’s outcomes. Verify important choices in-game. Researched 11/14/2026.
Before you start
- You must be partway through Lilac and Gooseberries. Talking to Gwynleve at the Nilfgaardian Garrison during that quest adds this one, and its objective changes to completing the griffin contract.
- The next quest in the chain is The Incident at White Orchard (per Fextralife). Do not start it yet if you want to finish White Orchard side content.
- Optional but recommended: the Viper School gear side quest, which makes the fight easier.
- Optional: finish Devil by the Well first if you want the extra dialogue option to ask Tomira about Claer.
- Have Swallow and Thunderbolt available. Bring Hybrid Oil and grapeshot bombs if you have them. The guides call oil recommended rather than strictly required.
1. Take the contract from Gwynleve
Speak to the commander at the Nilfgaardian Garrison while Lilac and Gooseberries is active. He will not give up Yennefer's location for free and asks for a griffin's head. Accept and the quest is added to your log. Take the quest from him before you explore the nest or attack site. One Steam user reported the Mislav objective flickering and being replaced by the nest objective after the area was visited early. That is a user report, not a confirmed bug.

Checkpoint: The Beast of White Orchard appears in your quest log and Lilac and Gooseberries now says to complete the griffin contract.
2. Ask Tomira about buckthorn and collect it
Tomira the herbalist lives east of the sawmill. Fextralife sends you to her first because she is nearer the garrison, but you can do her and the hunter in either order. Ask about the griffin and she explains that buckthorn has a pungent smell that attracts the beast. The plant is on the riverbed. Dive in, switch on Witcher Senses to highlight it, grab it and surface quickly. Drowners may be nearby and Geralt cannot fight underwater at this stage. If you already carry buckthorn in your inventory or stash, this objective is skipped. Collecting it before speaking to Tomira only skips a conversation, with no loss of XP or rewards. While you are there, you can ask about the dying girl to begin the optional side quest On Death's Bed. Do this before you finish the griffin quest. If you first speak to Tomira afterward, the game assumes you did not save the girl, and you never meet Lena if you skip Tomira altogether.
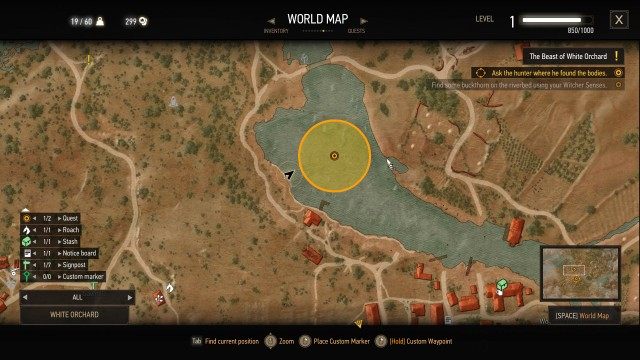
Checkpoint: Buckthorn is in your inventory and the buckthorn objective is ticked off.
3. Find Mislav the hunter
Mislav's hut is south of the village. Game8 places it southwest of the tavern, so the exact position differs between guides and you should follow the quest marker. Knock and nobody answers. Use Witcher Senses to show his footprints and follow them to find him. Then choose. Saying you are in a hurry makes him lead you straight to the attack site. Helping him first means killing wild dogs. That gives a 350 XP objective bonus (Fandom, Gamepressure and GameFAQs agree) and unlocks a later chat in which he tells a story from his past. The sources disagree on the number of dogs, three or four, and I could not verify which is right. You can hang back and let Mislav shoot, but his aim is poor, so it is slow. Skipping carries no penalty. If you reach the griffin's nest before this section, you miss all of it, including the XP.
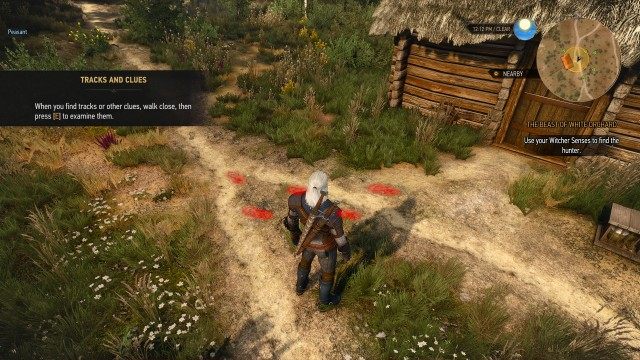
Checkpoint: Mislav is with you and leading you to the attack site, either immediately or after the dogs are dead.
4. Investigate the attack site and follow the trail to the nest
At the attack site, use Witcher Senses and examine the bottle, the campfire, the blood splatter and the footprints a little to the north. Then follow the footprints. The trail crosses the broken bridge and climbs a hill to the griffin's nest. You will need to climb a higher ledge and jump toward the farther path. There is no puzzle beyond Witcher Senses and that bridge jump. At the nest, examine the mutilated body, the bones and the dead griffin. Fandom gives 500 XP for completing this section. The conclusion Geralt draws is that the dead griffin is a female, so the attacker must be her mate.
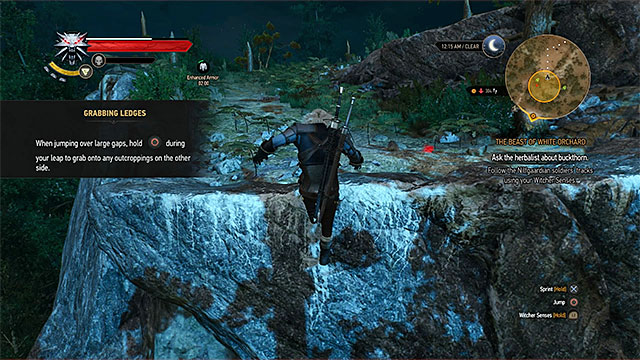
Checkpoint: The investigation finishes with Geralt concluding that the live griffin is the dead one's mate, and the objective changes to reporting back to Vesemir.
5. Talk to Vesemir and choose the ambush site
Vesemir stands outside the White Orchard inn, talking to a peasant about a local farmer named Boyan. If you have not told him about the contract yet, you must do so before you report your findings. After the discussion he picks the ambush location, which is the large field northeast of the village.
Checkpoint: You and Vesemir agree on a plan and the objective moves to preparing for the fight.
6. Prepare: brew Thunderbolt
Once the plan is agreed, an alchemy tutorial has you brew a potion. The potion is Thunderbolt, which temporarily raises attack strength. EIP notes it lasts for three uses. Consider also having Swallow ready. The griffin is vulnerable to grapeshot bombs, Hybrid Oil and the Aard sign. Gamers.wiki cites a 10 percent bonus damage from Hybrid Oil against hybrids. Most guides suggest applying it to the silver sword, but I would treat it as a helpful extra, not a requirement.
Checkpoint: Thunderbolt is in your inventory and the quest points you to meet Vesemir in the field.
7. Place the bait and fight phase one
Go to the field northeast of the village and confirm that you want to place the bait. You receive a crossbow with unlimited bolts. Drink Thunderbolt, and consider keeping Quen up, though that advice comes from Steam forum players and not official documentation. While the griffin is airborne, shoot it with the crossbow. EIP says a shriek signals a dive, and hitting it with a bolt at that moment brings it down. Aard can also stun the flying beast. On the ground, dodge or roll away from lunges and claw attacks, strike after the dodge, then repeat. Thunderbolt runs out, so refresh it if it ends.
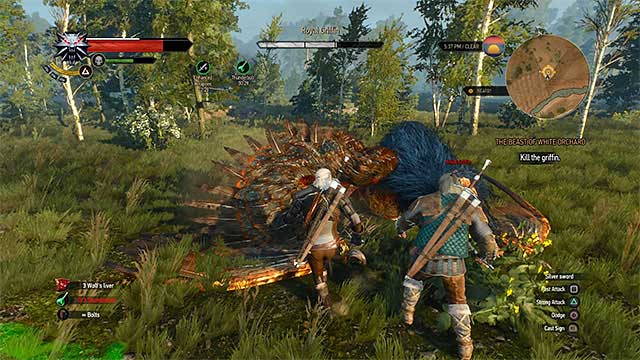
Checkpoint: The griffin is badly hurt and flies off from the field.
8. Chase and finish the griffin in phase two
When the griffin has taken enough damage it retreats. Gamepressure says it flies toward the windmill, and Fextralife says it moves to the mill and has no new attacks, so you should finish it quickly. The retreat point is disputed. TheGamer says about 50 percent health and a nearby ridge, while EIP says two thirds of its health lost. Treat it as roughly the midpoint and follow the quest marker. If you lose sight of it, use Witcher Senses and head for the red marker. If you ride, Vesemir may lag behind, so be ready to fight alone.
Checkpoint: The griffin dies and Vesemir comes over to talk.
9. Take the trophy and report to Gwynleve
Vesemir lectures Geralt after the kill. Loot the Griffin Trophy from the corpse. GameBanshee says it also drops a Griffin Mutagen. Return to the garrison and tell Gwynleve. He says Yennefer is in Vizima and offers payment. This is the first timed decision in the game. Refusing gives more XP and no coins. The reported numbers conflict, so I cannot give exact figures. Fandom says accepting gives 300 XP and 150 crowns and refusing 400 XP. Neoseeker and GameBanshee say 300 XP and 150 crowns for accepting and 500 XP for refusing. Fextralife says 250 crowns and 240 XP for accepting and 400 XP for refusing. GameFAQs says 350 XP at hand-in plus 150 crowns if you accept.
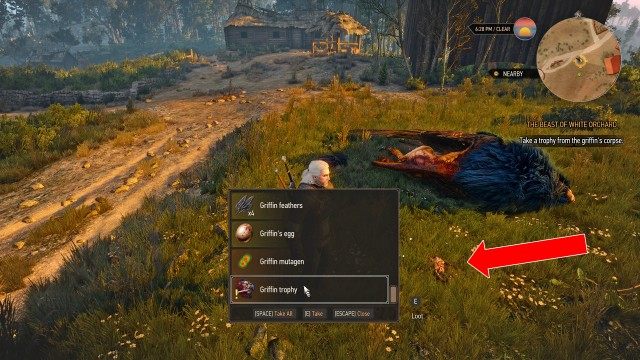
Checkpoint: The quest is marked complete and you are back in Lilac and Gooseberries.
10. Clean up White Orchard before moving on
After turning in the quest, the next step is the end of Lilac and Gooseberries. Talking to Vesemir there starts events that take you away from White Orchard, and some secondary quests fail if they are unfinished. Finish White Orchard side content, including On Death's Bed, before you do that.
Checkpoint: Your White Orchard side quests are done or deliberately abandoned before you speak to Vesemir for the next story step.
Choices and things you can miss
- Mislav: tell him you are in a hurry to go straight to the attack site, or help with the wild dogs for the 350 XP bonus and a story later. There is no penalty for skipping.
- Order of investigation: Tomira and Mislav can be done in either order. Fextralife suggests Tomira first because she is closer.
- Tomira's dying girl: ask about her to start On Death's Bed. It is not needed for this quest, but visit Tomira before the griffin dies if you want the better outcome.
- Payment: accept the coin or refuse for more XP. This is timed and permanent, and refusing yields more XP but no crowns according to every source.
- Fight preparation: Hybrid Oil, Quen and the Viper School gear are optional aids, not demands.
Rewards
- Yennefer's location, which is Vizima, from Gwynleve.
- Griffin Trophy, and possibly a Griffin Mutagen (GameBanshee only).
- Experience for the quest. Reported figures conflict, with 240 to 500 XP depending on the source and your choice.
- Optional 350 XP for helping Mislav and 500 XP for completing the investigation (Fandom).
- 150 crowns if you accept payment. Fextralife says 250, which makes it the outlier.
- A crossbow with unlimited bolts for the fight.
Troubleshooting
- Mislav objective missing or replaced by the nest objective: this follows early exploration of the area and is a user report, not a confirmed bug. Take the quest from Gwynleve before visiting the nest or attack site, and use the quest marker.
- No buckthorn objective: you may already hold buckthorn, which skips the step.
- Cannot find the buckthorn: dive in the river and use Witcher Senses on the riverbed. Surface quickly if drowners appear.
- Lost sight of the griffin after it retreats: use Witcher Senses and follow the red marker toward the windmill.
- Vesemir falling behind while you ride: expect to fight without him.
- Missed Lena or Mislav's story: you reached Tomira after the griffin died, or you went to the nest before Mislav. Those scenes cannot be recovered through the sources I found.
Release and platform notes
I found no evidence that the quest structure or objectives differ between versions, but most sources are undated, so that is unverified. Patch 4.04 (July 2023) fixed one issue for this quest: on PC, loading a certain checkpoint save could freeze the game with Ray Tracing enabled. The patch covered PC, PlayStation, Xbox and Switch. A Steam post quoting VGC says the next-gen update included a combat rebalance, which could subtly change the fight. I have not verified that against patch notes, so do not rely on it. I did not use GigglyGarden's guide because it claims the quest starts with Temerian soldiers in a tavern, contradicting every other source. The dog count, the XP and crown amounts, and the mid-fight health threshold are unresolved and need an in-game check.